Prototyping with Axure • Part 2 - Documentation
This is part 2 in a series, you can read part 1 here.
Document what you’re doing #
With Axure you can do crazy things with interactions. Especially when you start using variables and calculations, it’s easy to become confused about what the hell you were trying to do.
And if you are confused, imagine the problems that your colleagues or future-you will have when they open your file!
So help yourself and others, and document what you’re trying to do!
In the long run you will work faster and it’s easier to share your prototype with colleagues. Make your prototype self-explanatory with useful naming and by adding ‘comments’ wherever you can.
Naming and shaming #
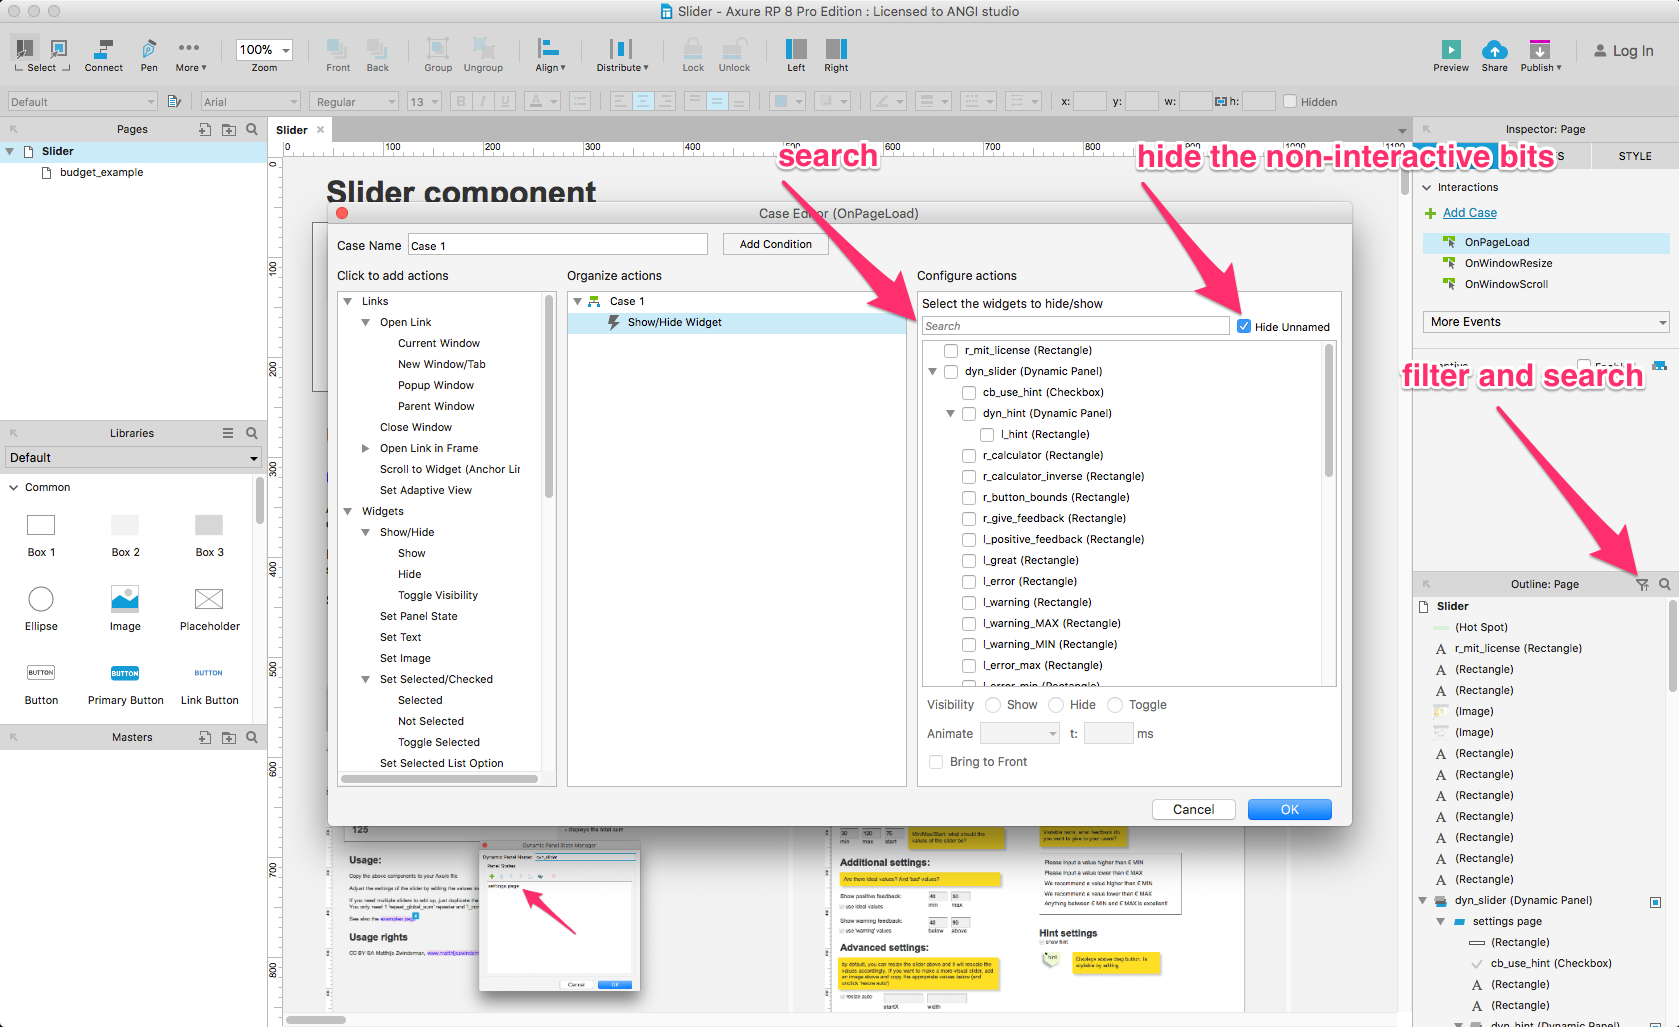
When you name your elements, they are easier to find in the search bar or in the case-editor (where you add your interactions). Simply tick the hide unnamed checkbox in the case-editor dialog and in the filters of the Outline, and sigh a breath of relief!
To make my life in Axure easier I have a naming convention. I start each element by indicating what it is:
l_for labelsdyn_for dynamic panelsimg_for imagesi_for input-fieldsb_for buttonsr_for simple rectangles / paragraphscalc_for control elements (more about that in another post!)
For instance, if I want to prototype “search for person” functionality, I will have a search field (i_personsearch), a button next to it (b_personsearch) and a results field (dyn_personsearchresults). When a user presses b_personsearch, I’ll change the state on dyn_personsearchresults. Easy-peasy.
Only label the things you need labeled! Don’t waste your time labeling everything!
Document your interactions #
When you make awesome prototypes all the crazy stuff happens in your interactions (onclick, onresize, etc.). That’s why you really want documentation there! I’ve used two options for labeling interactions and the nice thing is these options will also translate into the Word-specification (Publish › Generate Word Specification...).
Two ways to document:
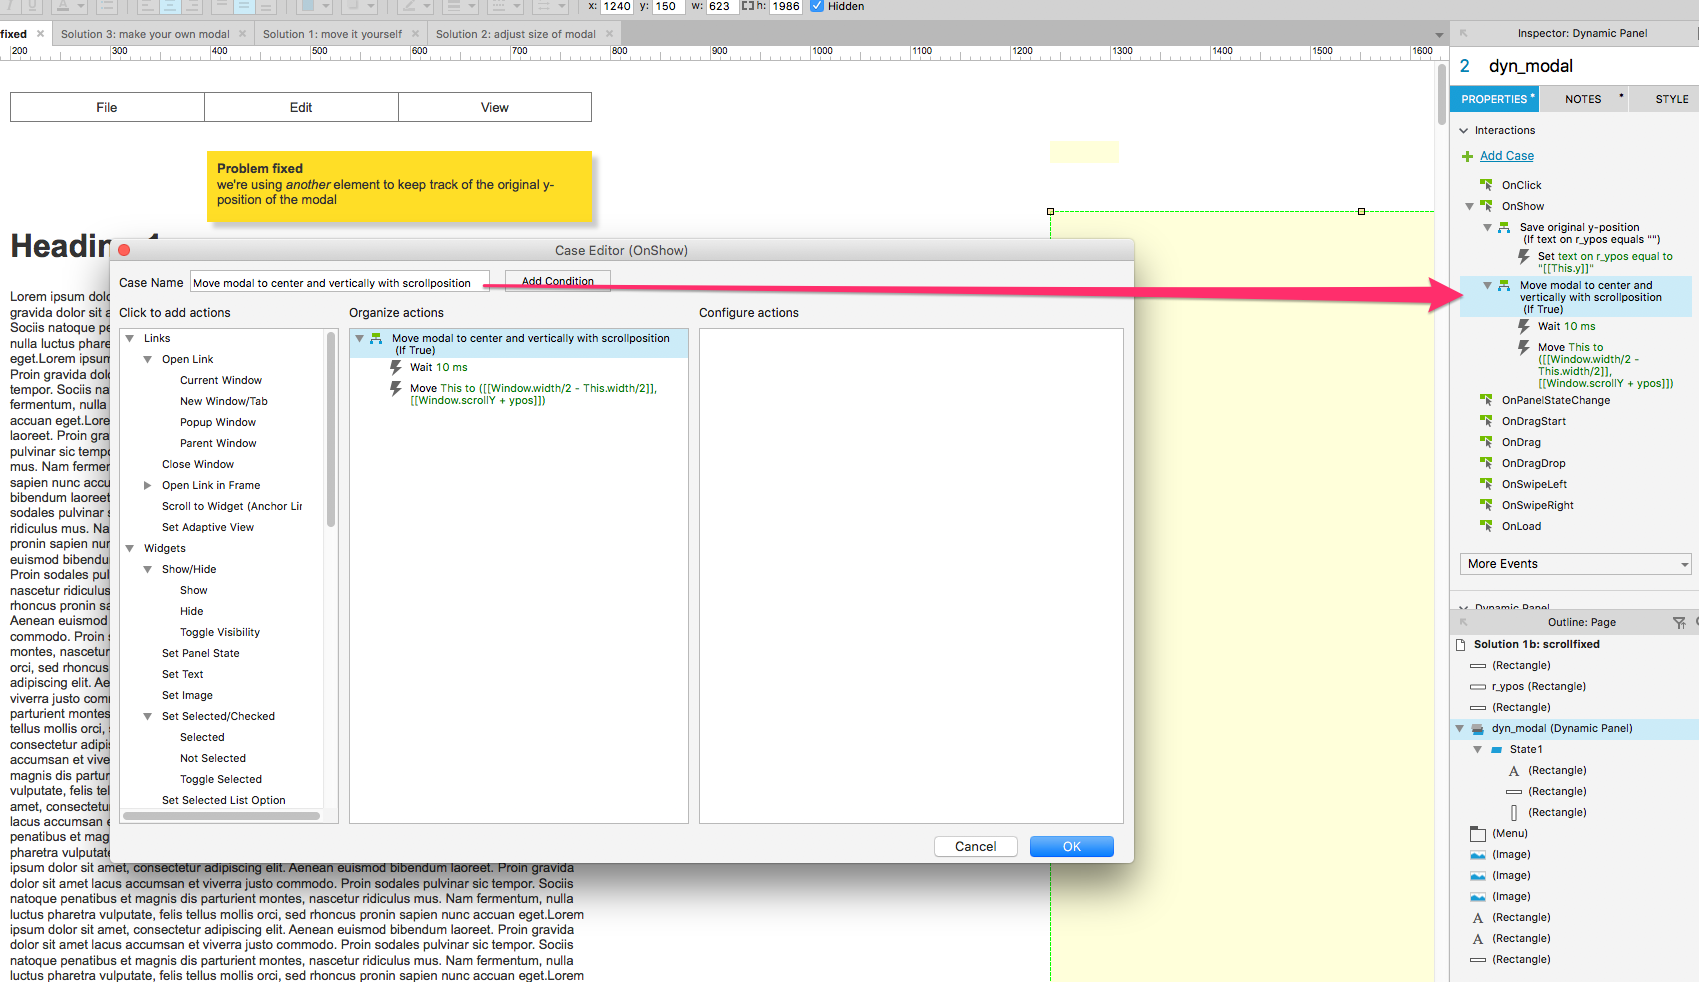
1. Abuse the ‘case-name’ #
I abuse the case-name to describe what the purpose is of interactions. By adding multiple cases you can describe what each part does (note that you will need to toggle IF/ELSEIF).
2. Use the notes panel #
The notes panel is the place where you ‘officially’ add documentation of what you’re doing. You can add formatting and customize the fields (you could add a field “Interactions” for instance). It has two downsides:
- easy to overlook: it’s in a separate tab from the interactions
- by default it adds ugly blue ’notes’ icon in your interactive prototype (turn this off in the generator options, “Widget Notes”, “Include Widget Notes Footnotes”).
Don’t use the interaction ‘miscellaneous / other’ #
Another trick I thought was great was add a miscellaneous › other-interaction in front of every interaction is not self-explanatory. The sad thing is that this sometimes triggers an alert, so I no longer use it 😒
This is part 2 in a series, you can read part 1 here or you can continue to part 3 here.